How to Install Curved Bathroom Glass Shower Door?

Sources
Step-by-Step Guide to Installing a Curved Corner Shower Enclosure
www.youtube.com
·
1
[PDF] INSTALLATION INSTRUCTIONS
pdf.lowes.com
·
2
How to Install the Delta® Round Corner Shower Enclosure - YouTube
www.youtube.com
·
3
How to Install a Delta® Curved Bathtub Shower Door - Video
support.deltafaucet.com
·
4

Answer
To install a curved bathroom glass shower door, follow these detailed steps:
Tools and Materials Needed:
- Gloves
- Drill
- Drill Bits (1/4", 1/8", 7/64", and 3/16")
- Extension Bit Holder
- Safety Glasses
- Caulk Gun
- Sealant
- Level
- Carpenter's Square
- Tape Measure
- Pencil
- Utility Knife
- Screwdriver
- Wall Anchors
- M4x35 Flat Screws
Step-by-Step Instructions:
1. Preparation
- Inspect the Product: Check for any transit damage or missing parts immediately upon receipt. Handle the tempered glass with care as it cannot be drilled, cut, or modified2.
-
Protect the Area: Cover the shower base with cardboard to prevent damage during installation. Ensure the shower base is level and the walls are plumb
.3
2. Marking and Drilling
- Mark the Placement: Use a level to mark vertical lines at the outside edge of the shower base. Position a wall post 1-1/8" (29mm) from the line and mark the location of the mounting holes on the wall2.
- Drill Holes: Carefully drill the marked holes using a 1/4" drill bit. Use a center punch and hammer to break the glazed surface of tiles to prevent skidding when drilling2.
3. Installing Wall Posts
- Install Wall Anchors: Insert wall anchors into the drilled holes2.
- Attach Wall Posts: Fasten the wall posts to the wall using M4x35 flat screws, ensuring the holes on the side of the wall post face the inside of the shower enclosure2.
4. Assembling the Frame
- Assemble the Frame: Follow the assembly drawing to connect the panels and install the frame. This step may require two people due to the weight and size of the glass panels2.
-
Install Top Track: Secure the top track in place, ensuring it is level and properly aligned
.3
5. Installing the Shower Door
- Install Door Guide and Brackets: Attach the door guide and brackets as per the manufacturer's instructions. This will help in aligning the door correctly4.
-
Install Shower Door: Carefully hang the shower door onto the frame, ensuring it is securely in place. Tighten all screws and fittings as required
.3
6. Sealing and Waterproofing
-
Apply Sealant: Use a caulk gun to apply silicone sealant along the edges of the shower enclosure to prevent leaks. Allow ample curing time as per the manufacturer's instructions
.3
- Install Profile Covers: Attach profile covers to conceal screws and provide a finished look2.
7. Finishing Touches
-
Install Accessories: Add any additional accessories such as handles or shelves. Ensure all components are securely fastened and properly aligned
.1
- Clean Up: Remove any protective coverings and clean the shower door with a non-abrasive cleaner to remove any installation residue2.
References
1. Step-by-Step Guide to Installing a Curved Corner Shower Enclosure2. [PDF] INSTALLATION INSTRUCTIONS3. How to Install the Delta® Round Corner Shower Enclosure - YouTube4. How to Install a Delta® Curved Bathtub Shower Door - Video5. How to Install a Delta® Curved Bathtub Shower Door - YouTube
Author: American Standard
Key insights
-
️ Assembling the curved frame requires two people and careful attention to the placement of the post with the magnetic strip.
-
The installation process requires precise placement and secure attachment of the glass clips and screws.
-
🧰 Installing a shower door gasket can be made easier by using a wooden dowel to press and slide along the length of the fixed panel.
-
The process of fitting the frame assembly into the shower opening requires two people to accomplish successfully, highlighting the importance of teamwork in the installation process.
-
Swapping the top and bottom rollers on the sliding door is crucial to prevent the door from swinging out of the track and potentially breaking.
-
Installing the shower door requires careful attention to detail and proper alignment of the panels and gaskets.
-
Using silicone between the wall post and shower wall and bottom of the frame and shower base is crucial for the installation of the shower door.
Video Full Text
-
This installation video will demonstrate step by step how to install the Axis 36 inch curved shower door before starting work protect. The shower base from damage by covering it with cardboard or similar material and tape over the shower drain to prevent loss of screws or other small parts. The first step is to assemble the curved frame. Two people are required. The post with the magnetic strip is to be on the side that the sliding glass door is on using the M4X35 screws assemble. The two post to the bottom horizontal rail.Read More
-
Install gaskets on the top and bottom of the fixed panel using the glass clips to determine the starting point for gasket next insert the fixed panel in the groove of the wall post without the magnetic strip ensuring that is fully inserted into the groove. Next, use four M4X35 screws attach the top horizontal rail to the post using the M4X12 screws secure. The two glass clips to the top and bottom.Read More
-
Horizontal rails next insert the fixed panel gasket into the gap on the inside of the fixed panel and post start about three inches from the top and press the seal in working down the panel. Then press in the remaining three inches portion of the gasket at the top of the panel. A helpful hint is to press against the gasket with a wooden dow and slide along the length of the fixed panel. Finally, trim any excess gaskets as needed.Read More
-
With the shower base and walls installed use a level placed at the outside edge of the shower base to mark a vertical line on both sides and position. The wall post one and one-eighth inch from the drawn line. Ensure that the wall post is plumb then mark the location of the mounting holes on the wall. Remove the post and using a one-quarter inch drill bit drill holes where the marks on the wall. Install the wall anchors and plugs use the M4X35 flat screws and fasten one wall post to the wall. Repeat the process for the second. Section 3, fitting the frame assembly into the shower opening. Two people are needed to accomplish these steps successfully. Place the completed frame on the shower base and insert the ends into the wall posts. Ensure that the frame is centered on the shower and that the frame is fully inserted into the wall post.Read More
-
If at this point of the installation of the sliding door needs to be changed to the other side of the enclosure. The frame needs to be rotated 180 degrees and the top and bottom rollers on the sliding door must also be swapped. If the rollers are not exchanged. They could release from the track and the door may swing out from the track. Most importantly the bottom rollers are not intended to support the door not exchanging the top and bottom rollers could result in the door breaking. Section four, installing the sliding door panel into the frame. Place the top rollers in the top horizontal rail.Read More
-
The next step is to pull the bottom hooks down and insert them into the bottom rail. Install the knob handle set on the sliding door panel as shown here. Next install the side gaskets on the side of the panels ensuring that the flange on the gaskets face the other panel.Read More
-
Section six, fixing the frame to the wall post. Using an 1/8 inch drill bit drill holes in the frame post using the holes in the wall post as location guides. Usingthe M4X8 screws and washers secure the wall posts to the frame post, then place the screw cover caps over the screw heads. There are two steps in the final section Section seven. First install the wall jam and extender capsule to the top of the wall post. Finally, placed silicone between the wall post and shower wall and bottom of the frame and shower base allow the silicone to dry 24 hours before using the shower. This complete the installation of the axis 36 inch curved shower door. Please reference the installation guide for cleaning and maintenance of the shower door.Read More
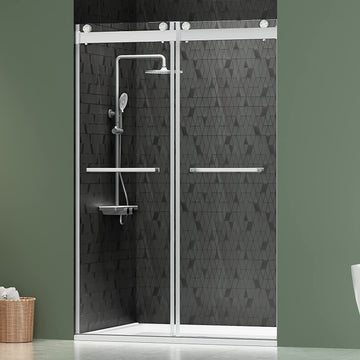
DELAVIN 44-48 Inch Width x 75 Inch Height Frameless Shower Door, 5/16" Clear Tempered Glass, Double Sliding Shower Door with Square Rail
$699.99
Buy Now
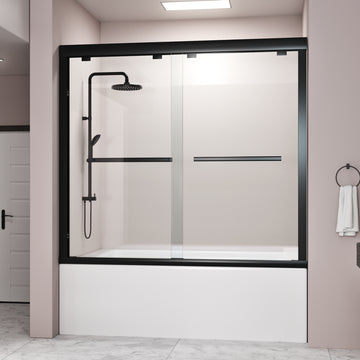
DELAVIN Bypass Tub Shower Door Double Sliding 56-60 in. W x 59 in. H Semi-Frameless Bathtub Door, 1/4 inch SGCC Clear Tempered Glass Tub Door With Explosion-Proof Film, Black Shower Door
$459.99
Buy Now

DELAVIN Frameless Shower Door, 56-60" W x 75" H Sliding Shower Doors, SGCC Certified Clear Tempered Glass with Explosion-Proof Film, Easy to Clean, Stainless Steel Guide Rail
$559.99
Buy Now