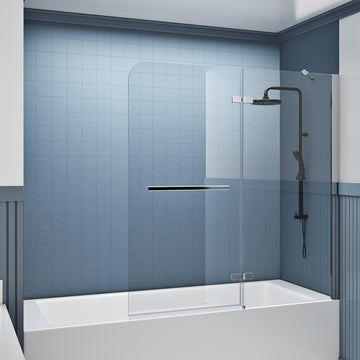
How to Install Sliding Bathtub Shower Doors
Introduction
Installing bathtub shower doors can be a daunting task for many homeowners, especially those who have never attempted any DIY project before. However, with the right tools and steps, it is possible to install bathtub shower doors without hiring a professional.
Tools
To successfully install sliding glass shower doors, it is crucial to gather all the necessary tools and materials beforehand. Having everything prepared will ensure a smooth and efficient installation process. Here are the essential items you will need:

Step 1: Measure the Width of the Bathtub
Before installation, make sure the glass shower door and panel fit within the tub enclosure. Use a measuring tape to find the distance from wall to wall along the top edge of the bathtub and, for the top track, at 6 feet above it. And it's better to measure each dimension more than once to avoid errors.
Note: Don't forget to follow the manfucturer's instructions and subtract the required amount for each track from the total width of the opening.
Step 2: Mount the Base Tracks
Once you have measured the width of your bathtub and had the right shower door kit, it's time to install the tracks. Cut the base track to the appropriate length, and use a metal file to smooth the cut end.
Place the bottom track along the edge of the tub, following the manufacturer's instructions. Use a level to ensure it's perfectly plumb. When aligned, please use a pencil to mark the location of screw holes on the wall.
Using a drill and appropriate screws, secure the bottom track to the tub wall. If your tub wall is made of tile, you might need to use wall anchors to ensure a strong hold. Make sure the track is securely in place before proceeding.
Note: When you install the base tracks, put the high side of the track which is the side towards the outside. It'll keep the water from spilling out from the tub. And it's better to wear safety goggles if you need cut the track.

Step 3 Install the Wall Jambs
Position the two wall jambs into the bottom track and make sure they are vertical. Remove the wall jambs, mark the hole and then drill into the wall. If you’re drilling into ceramic tile, it's better to use a 1/4-inch ceramic and glass bit. While for other materials, you can use use a 1/8-inch drill bit.
Place wall jambs into or over the bottom track, according to the manufacturer’s instructions. And fasten the wall jambs with the provided screws or the anchor.
Note: Sliding door kits includes rubber bumpers. Install them over the screws at the top and bottom of the jamb.
Step 4 Install the Top Tracks
Measure the width of the wall to wall and the length of the top tracks. Use a pencil to mark the exact placement of the top tracks on the wall above the tub. Ensure the marks are level and aligned with the side tracks. With the marks in place, use a drill with a small pilot bit to drill the holes at the marked positions. These pilot holes will make it easier to insert the screws.
Hold the top tracks in position, aligning them with the pilot holes or anchors. Depending on the design of the tracks, they may have mounting brackets that need to be attached to the wall. Insert screws through the holes in the top tracks and tighten them into the pilot holes or anchors using a screwdriver or drill.
Note: Some tub shower door kits have rollers or brackets attached to the door panels that fit into the top tracks. Put the rollers into the top tracks, and make sure the protuding side of the screw faces outward.
Use a level to ensure the top tracks are perfectly level and aligned with the side tracks. This step is crucial to ensure that the door panels will hang and slide smoothly.
Step 5 Hang the Door Panels
With the top tracks securely mounted, you can hang the door panels. Lift the inside panel first and carefully fit the rollers or brackets into the top tracks. Gently slide the panel along the tracks until they are properly positioned. Repeat the above instruction to install the outside panel as well.
Step 6 Install Handles and Hardware
Attach the handles to the door panels according to the manufacturer's instructions. This step might involve using screws or other hardware provided in the kit. Make sure the handles are secure and function properly.

Step 7 Caulk and Seal
Sealing the edges of your bathtub shower doors is a crucial step in preventing water damage and leaks. Start by cleaning the edges of the shower doors with a mild cleaner and allowing them to dry completely. Then, apply a bead of silicone caulk along the edges where the shower doors meet the bathtub and wall. Use a caulking tool or your finger to smooth out the caulk and remove any excess.
Note:It's essential to follow the manufacturer's instructions for drying time before using your new shower doors.
Step 8 Final Check
Once you have completed the installation, it's time to test the doors to ensure that they open and close smoothly without any leaks. Start by opening and closing the doors multiple times to check for any resistance or obstruction.